Create Routing Templates
Routing beats the jigsaw in quality.
But you need templates.
Alongside the designs, you can download them as templates in PDF format. Using these, you can create templates to accurately route the outline of your cuckoocaster body. They are designed to fit the Strat guitar body and indicate where and how much material needs to be removed.
This short DIY Guide deals with taking away excess wood from your strat-shaped body to reveal your Cuckoocaster. You can use a jigsaw to build a Cuckoocaster. Using template and routing the body contour achieves slicker results. Before get into this, a short list of other ways routing is used in guitar making:
- Pickup Routing: cavities for pickups, mounting screw holes, and wire channels.
- Control Cavity Routing: recesses for volume and tone controls, switches, output jacks, other control components.
- Bridge and Tailpiece Routing: e.g. tune-o-matic bridges, tremolos.
- Neck Pocket: achieve accurate and secure neck-to-body joints.
- F-Hole Routing: for hollow or semi-hollow guitars with F-holes, could be for show or sound :)
- Pickguard Routing: outside shape as well as fitting the guitar’s pickups, controls, etc.
In your Cuckoocaster production, the body shape is the main issue. You might also want to create or modify the pickguard, add an f-hole or make cavity space for different pickups.
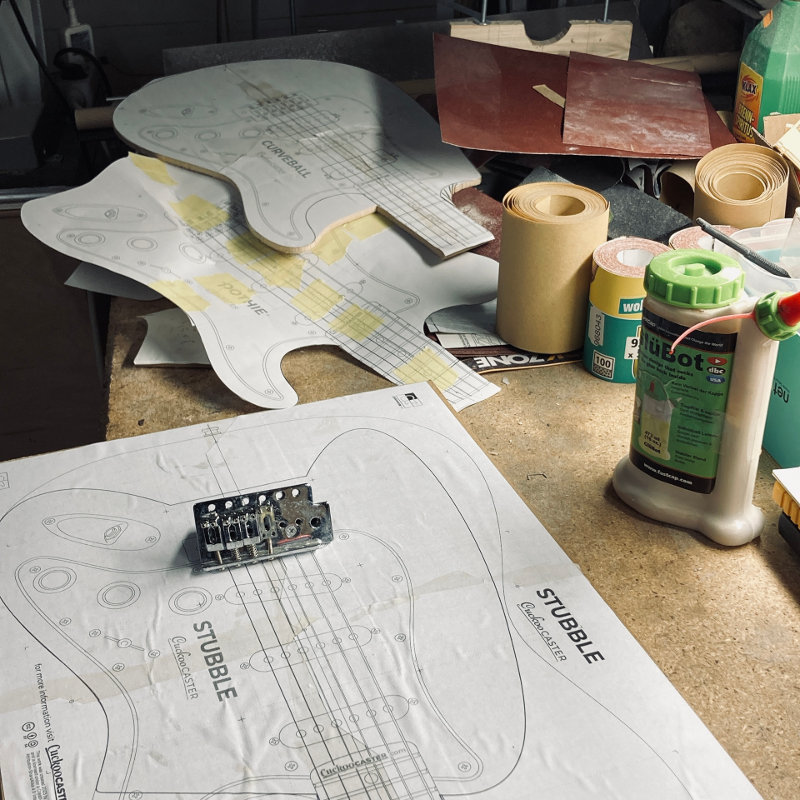
Step 1: Putting the paper pieces together
The PDF files split the body template into four individual sheets. Designed for A4 sheets, they should also fit US Letter size. When printing: do NOT change actual size. Print as is!
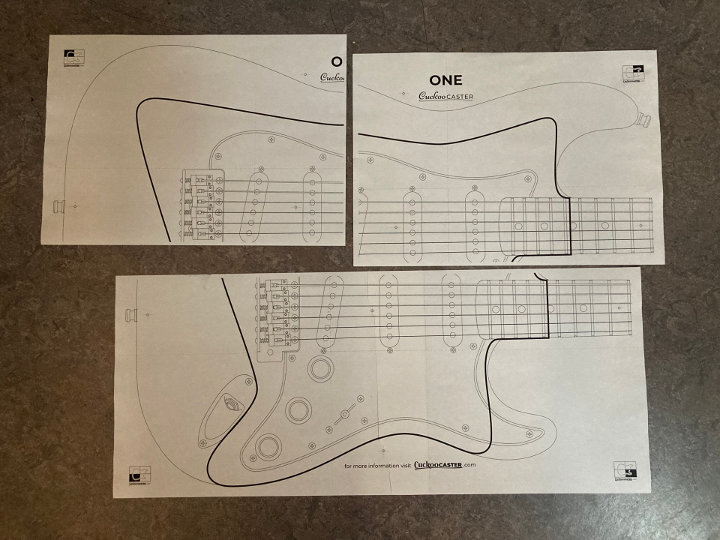 The printouts are designed for A4 sheets, but the overlap should be large enough to work for US letter, too.
 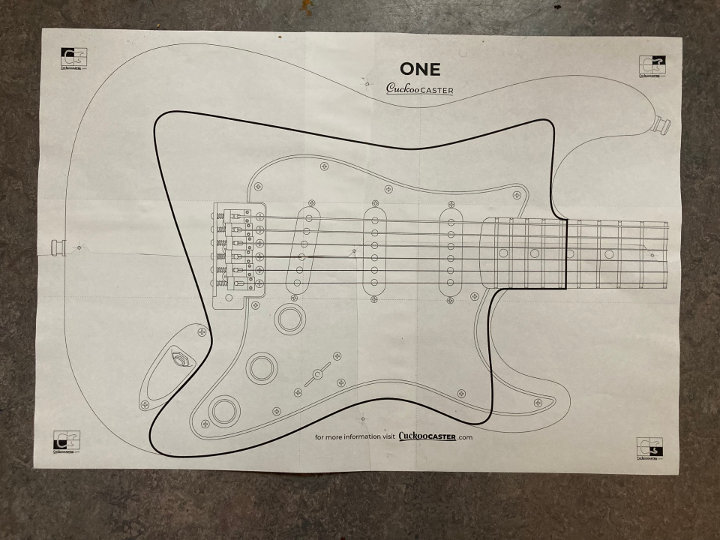 There are markers and grids on the printouts to make it easier being perfect :)
 Step 2: Adjust to your individual strat body
Every Strat looks alike. But the devil is in the detail. Not every Strat body is like any other. Not only because there were changes over time, but especially Strat copies often vary slightly. And when you put heavy machinery to your instrument, you want to be sure that the routing will not miss the mark.
Place your body on the assembled paper template and see where it doesn’t fit. You can now manually adjust the paper template. This way, the template you will create for the routing, based on this paper version, will fit your Cuckoocaster like a glove.
Even with the perfect fit, there are a few considerations about the start and stop points described in the next step.
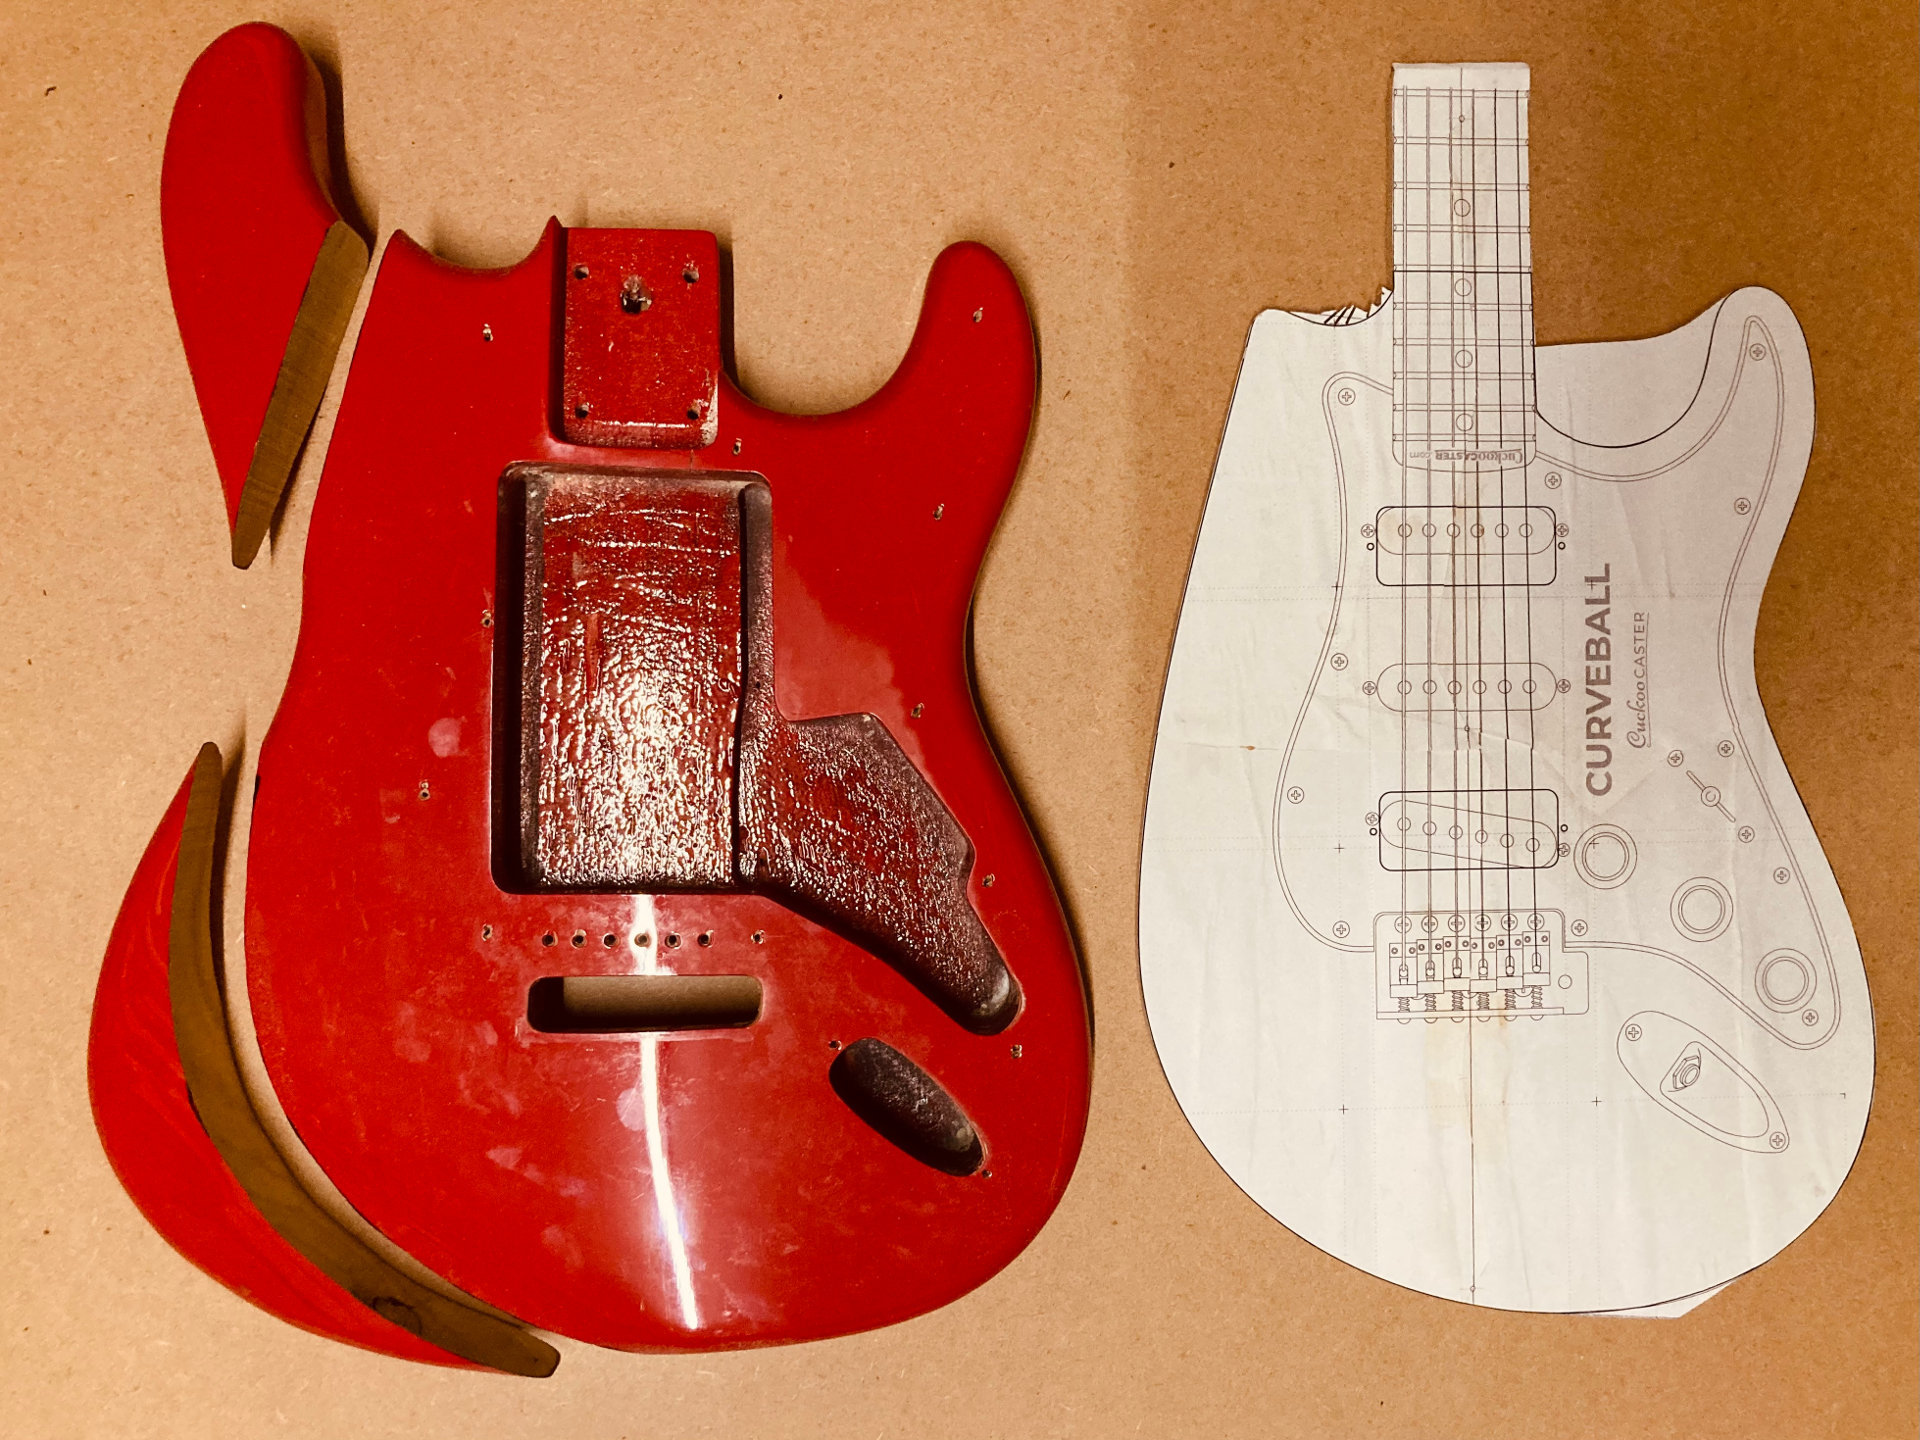
Step 3: Building ramps for your router in the template
Where the routing starts and where it stops, these are the most crucial points. You do not want to run the router along the entire outline of the body, but only where it's needed.
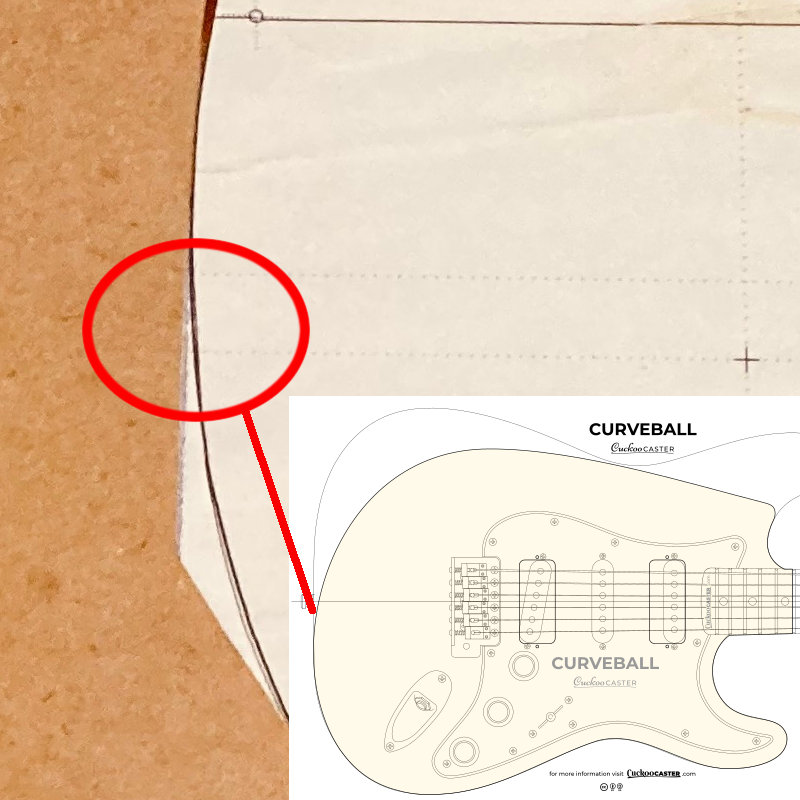 The red spot marks where new shape (CURVEBALL shape at the top) meets the actual strat outline (bottom). You can see the ramp which leads away from the new shape on a tangent.
 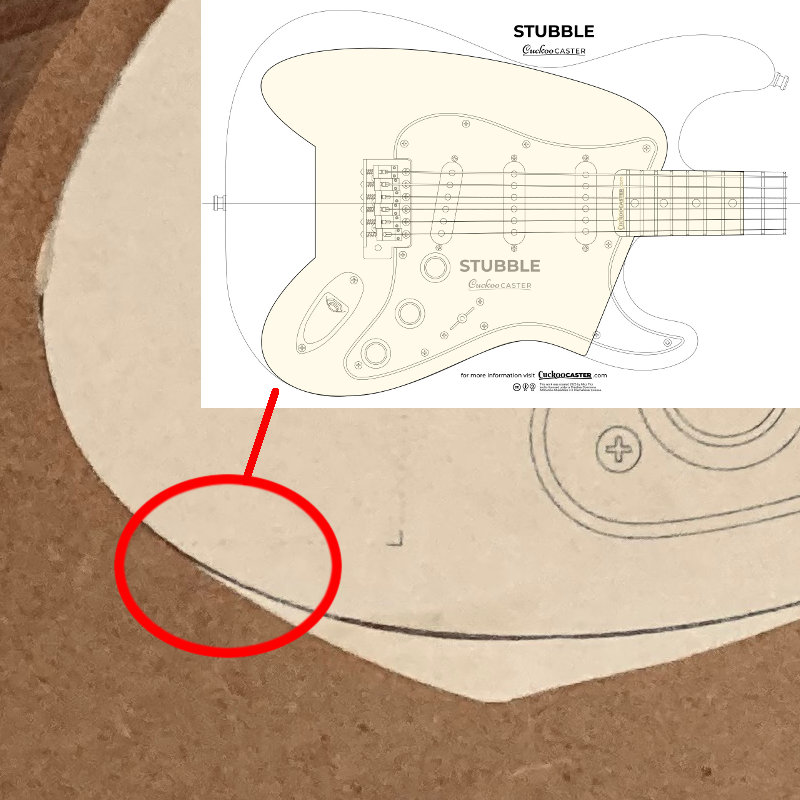 Here the STUBBLE design bends around the jack plug to line up with the strat shape. Again: the ramp is a tangent smoothly leading the router away from the body.
 Step 4: Transfer the paper template to MDF (medium-density fiberboard)
I make the routing templates of MDF no thicker than 5 or 6 mm. MDF is my favourite material, because it’s smooth, easy to shape and glue on.
Place the glued A4 template on top of the MDF sheet. Almost any glue will do. My advice: do a test run on the glueing process. And: applying glue to the paper, too, will result in a smoother surface. Because the glue on the MDF surface will soften the paper, which will expand in the process and start wrinkling. Applying glue to both will evade that trap.
Step 5: Cut out the MDF template
Use a jigsaw or coping saw to carefully cut along lines on the MDF sheet, following the Cuckoocaster body shape. Don’t forget about the on and off ramps mentioned above!
Step 6: Refine the template
After cutting the MDF template, check the edges for any rough or uneven areas. Use sandpaper to smooth out the edges and refine the shape. Keep in mind: you can not bring back what you sand off. So take care to maintain the Cuckoocaster shape.
Step 7: Test and Adjust
Once you have refined the template, test it by placing it on your guitar body. As mentioned above: strat bodies don’t all have the same shapes. The small differences make a huge difference once you start routing. So your template must fit your guitar. Check for accuracy and make any necessary adjustments by sanding or reshaping the MDF template.